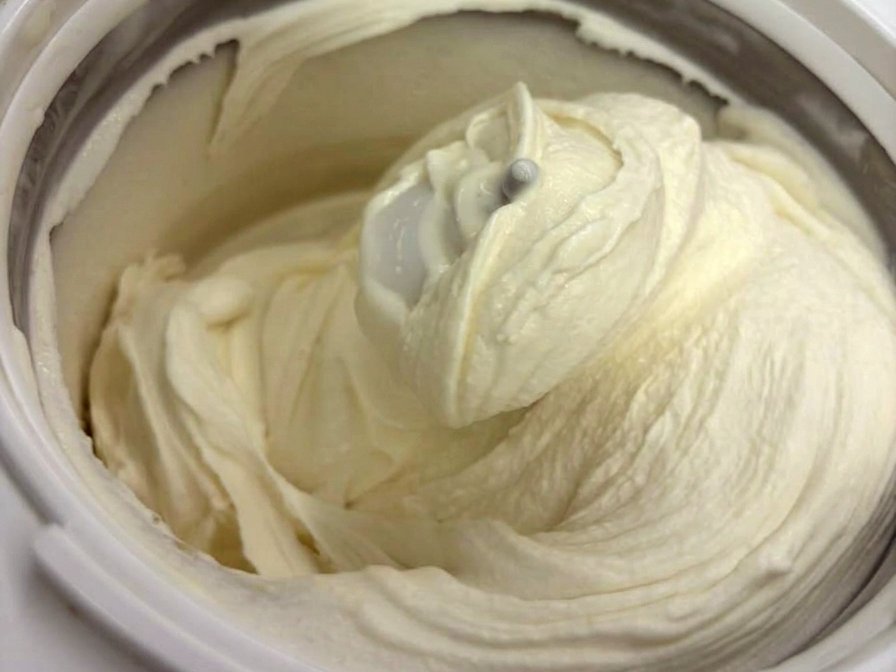
To make gelato at home, you need a balanced base, heated to 70–85 °C, aged in the fridge for at least 4 hours, churned in an ice cream maker for 20–30 minutes, then hardened at −18 °C and served softer, at about −12 to −14 °C. That's the whole process: five stages, and each one has a number and a sign that tells you it's done.
Most homemade gelato recipes list the steps and skip the reasons, which is why so many batches come out icy, rock-hard or thin. This guide goes through each stage in order with the temperature, the time, and what to look for. It finishes with a complete first recipe, fior di latte, which you can open in our free gelato calculator and change without losing the balance.
What You Need
The equipment list is short. Two items on it aren't optional.
- An ice cream maker. A churn freezes the base while beating it, which keeps the ice crystals small. Freezer-bowl machines are cheap and work well, but the bowl needs at least 24 hours in a −18 °C freezer before each batch. Compressor machines cost more and freeze their own bowl, so you can churn back-to-back.
- A digital scale that reads to 0.1 g. Gelato is weighed, not measured in cups. The stabilizer in the recipe below is 4 g; a teaspoon is nowhere near accurate enough for that.
- An instant-read thermometer. Three of the five stages have a target temperature, and guessing them is where most first batches go wrong.
- An immersion blender. A whisk works, but a blender disperses the stabilizer and milk powder far more thoroughly, and undissolved stabilizer turns into lumps.
- A heavy-bottomed saucepan, a fine-mesh strainer, a bowl of ice water, and a shallow, lidded freezer container.
Stage 1: Balance the Recipe
This stage happens before you turn on the stove, and it decides most of the texture. Gelato is a frozen mixture of water, fat, milk solids and sugar. The ratio between them sets how much of the water turns to ice at serving temperature, and how big those ice crystals get. A balanced gelato base usually lands around:
- Fat: 6–9%. Enough for body, but less than ice cream's 14–18%, which is why gelato tastes more of milk than of cream.
- Milk solids non-fat (MSNF): 9–11%. Milk proteins and lactose. They give gelato its chew and bind water.
- Total sugars: 16–22%, counting the lactose from the dairy. Sugar sweetens, but more importantly it lowers the freezing point. Too little and the gelato freezes rock-hard. Too much and it never sets.
- Total solids: 32–40%. Everything that isn't water. Below about 32%, there's too much free water and the result is icy.
The other number that matters is PAC, a sugar's anti-freezing power. Dextrose has almost double the PAC of table sugar but is less sweet, which is why balanced recipes swap some sugar for it: the gelato scoops softer without tasting sweeter. What Is PAC in Gelato? explains both numbers and works them out for this recipe.
You don't have to do this math by hand. Every number above is computed live in GelatoLator as you type in ingredients, and anything out of range turns red. If you start from a recipe you found online, check it before you heat anything; How to Balance Any Gelato Recipe walks through fixing one. The How It Works page explains each metric in more depth.
Check your own recipe's balanceStage 2: Heat and Mix
Target: 70–85 °C for 1–2 minutes. The exact number depends on your stabilizer.
Heating does three jobs. It dissolves the sugars and milk powder completely, it hydrates the stabilizer, and it pasteurizes the base. How hot you need to go is set by what's in the pot:
- Locust bean gum or carrageenan (the base of most gelato stabilizer blends): 83–85 °C. Both need real heat to dissolve and hydrate fully.
- Egg yolks: at least 80 °C to pasteurize them, and no higher than 85 °C, where they start to curdle.
- Guar, xanthan or a cold-process blend: these hydrate without heat, so 70 °C is enough to dissolve the sugars and milk powder.
- A ready-made blend: follow the temperature on the label. If you don't know what's in it, 85 °C works for all of the above.
- Nut pastes (pistachio, hazelnut, almond): 85 °C to pasteurize them, whatever stabilizer you use.
- Whisk all the powders together dry first: sugar, dextrose, milk powder and stabilizer. Stabilizer that hits liquid on its own forms rubbery lumps that never dissolve. Spread through the sugar, it disperses evenly.
- Warm the milk and cream to about 40 °C, warm to a fingertip, then add the dry blend and blend it in with the immersion blender for 20–30 seconds, until no powder floats on top. Milk powder dissolves far better in warm liquid than in cold, and the stabilizer has to be fully dispersed before it starts to thicken.
- Nut pastes like pistachio go in now, so they're pasteurized along with the dairy. That makes your target 85 °C.
- Cocoa powder, a split vanilla bean or coffee beans to infuse also go in now, with the dairy.
- Using egg yolks? Whisk them loose in a bowl, stir in a ladle of the warm base so they don't scramble, then pour them back into the pot.
- Keep heating to your target temperature, stirring constantly, and hold it there for a minute or two.
- Strain it. Off the heat, pour the base through a fine-mesh strainer into the container you'll cool it in. It catches any lumps of powder or stabilizer, and with eggs, any threads of cooked yolk.
- Using chocolate? Melt it in now. Chop it fine, add it to the strained hot base and stir until it has melted completely, then cool the whole base down (Stage 3). Added after straining, none of it is left behind in the strainer.
It's done when the thermometer reads your target and the base feels slightly thicker on the whisk, like thin cream rather than milk. With egg yolks, the base is a custard and should coat the back of a spoon; our vanilla gelato recipe walks through that version.
Stage 3: Age the Base
Target: 4 °C or colder, at least 4 hours, ideally 8–12.
First, cool the hot base fast. Set the container in a bowl of ice water and stir until it drops below 10 °C, then press plastic wrap onto the surface so no skin forms, and refrigerate.
Stir in extracts and essences now, once the base is cold and before it goes in the fridge: vanilla extract, almond extract, rose or orange-blossom water. Their aroma evaporates in the hot pot, but hours in the cold base give it time to spread evenly through the mix.
Aging isn't just chilling. Over those hours the milk proteins and the stabilizer fully absorb water, and the fat partly crystallizes. Both of those help the base trap air and form small ice crystals in the churn. An aged base churns faster, rises more and comes out smoother than the same base churned warm. Overnight is the easy way to fit it in: make the base in the evening, churn the next day.
It's done when the base is at fridge temperature all the way through (check the center with the thermometer) and noticeably thicker than when it went in. Don't keep it longer than about 48 hours.
Stage 4: Churn
Target: 20–30 minutes, until it holds its shape.
Blend the aged base for a few seconds with the immersion blender, or whisk it if you don't have one: it thickens and settles as it ages. Start the machine, then pour the base in. If you pour it into a still freezer-bowl, a layer freezes solid to the wall before the paddle can move it.
Add these to the aged base just before churning, not to the hot pot and not before aging:
- Yogurt: heat kills its live cultures, and its acidity can curdle hot milk. Added last, it keeps its fresh tang.
- Alcohol (liqueur, rum, wine): heat cooks it off, and it gains nothing from aging. Keep it small, since alcohol lowers the freezing point a lot; the calculator shows how much.
- Fresh fruit purée or citrus juice: cooking dulls the fresh flavor, and the acid can curdle hot milk. A night in the base dulls it too, and fresh pineapple, kiwi or papaya contain enzymes that break down milk proteins and turn the base bitter.
Churning does two things at once: it freezes the base fast, which keeps ice crystals small, and it works in a little air. Gelato takes in less air than ice cream, about 20–35% extra volume against ice cream's 60–100%, which is why it's denser.
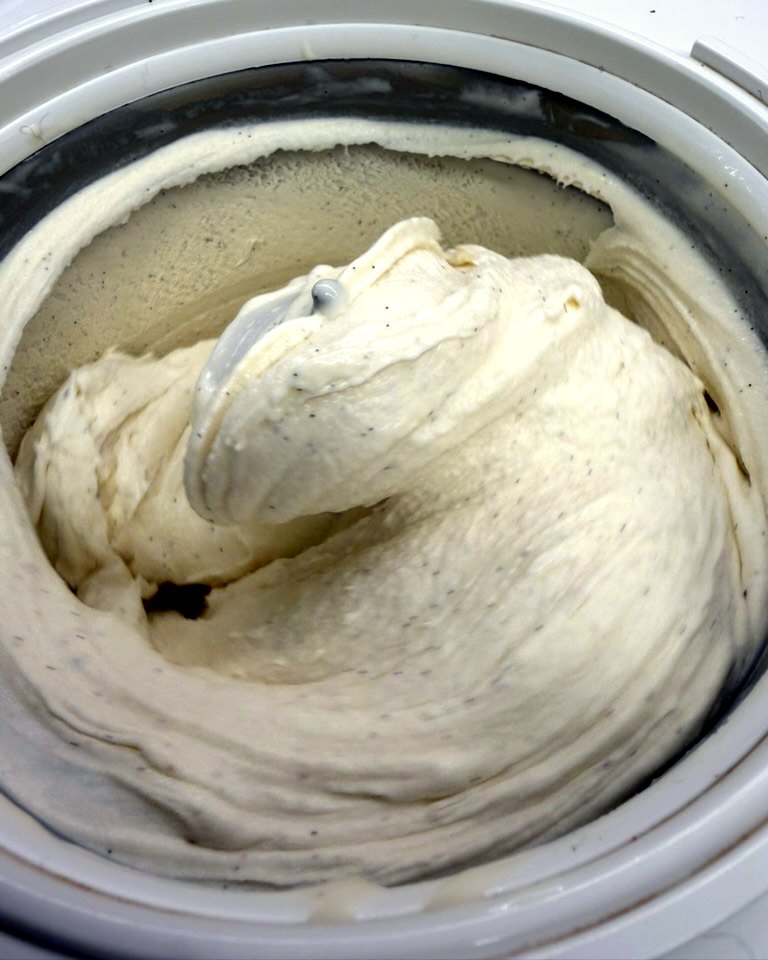
It's done when:
- it pulls away from the side of the bowl and folds over itself instead of sloshing,
- it holds a ridge on the paddle when you lift it out,
- the surface looks matte, not glossy,
- and it reads around −6 °C, if your thermometer goes that low.
Don't churn on past that point. The gelato won't get any colder in a home machine, and the fat starts to clump into butter-like specks. If it's still soupy after 30 minutes, the bowl wasn't cold enough or the base was too warm.
Add these in the last minute of churning, chopped small and cold so they don't melt or sink:
- Chocolate chips or shavings, chopped nuts, cookie or brownie crumbs.
- For stracciatella, drizzle melted chocolate in a thin stream; it sets into flakes as it hits the cold gelato.
Stage 5: Harden and Serve
Target: harden at −18 °C for at least 2 hours, then serve at about −12 to −14 °C.
Straight from the machine, gelato is soft-serve. Spread it into a pre-chilled, shallow container: a thin layer freezes faster, and faster freezing means smaller crystals. Press parchment directly onto the surface so it doesn't frost, then put it at the back of the freezer, away from the door.
Sauces and ripples (caramel, fudge, fruit swirl) go in as you fill the container, not in the machine: spread a layer of gelato, drizzle the sauce, and repeat. Churned in, they mix through completely and the ribbon disappears.
The step home cooks most often skip is serving it warmer than it's stored. A home freezer runs at −18 °C. Gelaterias serve at −12 to −14 °C, which is the temperature gelato is balanced for. At −18 °C even a well-balanced base is stiff. Before serving, move the container to the fridge for 10–15 minutes, or leave it on the counter for 5–10, until a spoon goes in with gentle pressure.
Homemade gelato is best within 5–7 days. After that the ice crystals slowly grow and the texture coarsens. If yours has gone icy, Why Is My Gelato Icy? works through the five likely causes in order.
Your First Gelato: Fior di Latte
Fior di latte ("flower of milk") is the plainest gelato in an Italian gelateria: milk, cream and sugar, with no eggs and no flavoring. That makes it the right first recipe. There's no custard to curdle, and with nothing to hide behind, it shows you exactly what good texture tastes like. Every other milk-based flavor is this base plus something.
| Ingredient | Weight |
|---|---|
| Milk (3% fat) | 650 g |
| Heavy cream (36% fat) | 150 g |
| Skim milk powder | 50 g |
| Sucrose (white sugar) | 115 g |
| Dextrose | 30 g |
| Stabilizer blend | 4 g |
Makes 1 kg, about 8 servings. Prep 15 min · Cook 10 min · Total about 7 hours, including 4 hours of aging and 2 of hardening.
Balance: about 7.4% fat, 11% MSNF and 33% total solids, all in GelatoLator's green zone. Open the recipe to see the full set, including PAC and serving temperature.
Estimated nutrition (per 125 g serving): ~210 kcal · 9 g fat · 27 g carbs (26 g sugars, including lactose) · 5 g protein. Calculated from the recipe; actual values vary with the exact ingredients.
Method.
- Mix the dry blend. Whisk the skim milk powder, sucrose, dextrose and stabilizer together in a bowl.
- Warm the dairy. Heat the milk and cream in a saucepan over medium-low heat to about 40 °C.
- Heat the base. Add the dry blend and blend it in with an immersion blender until no powder is left. Keep heating, stirring constantly, to the temperature your stabilizer needs: 83–85 °C for most blends, which contain locust bean gum or carrageenan (check the label). Hold it there for 1–2 minutes, until the base feels slightly thicker.
- Strain, cool and age. Pour through a fine-mesh strainer into a clean container set in an ice bath and stir until it's below 10 °C. Press plastic wrap onto the surface and refrigerate at least 4 hours, ideally overnight.
- Churn. Blend (or whisk) the base briefly, start the machine, pour it in and churn for 20–30 minutes, until it pulls away from the bowl and holds a ridge on the paddle.
- Harden. Spread into a pre-chilled shallow container, press parchment onto the surface and freeze for at least 2 hours.
- Serve. 10–15 minutes in the fridge (or 5–10 on the counter) before scooping.
No stabilizer? Leave it out and the recipe still works. It will be a little thinner and turn icy sooner, so eat it within 2–3 days.
Open this recipe in GelatoLatorWhere to Go Next
Once fior di latte comes out right, every other flavor is a change to one stage:
- Add egg yolks and vanilla for the classic custard base: Vanilla Gelato Recipe: Two Balanced Bases.
- Add a flavor like pistachio paste, cocoa or coffee. Each one shifts the fat, solids and sugar balance, so load fior di latte into the calculator, add the ingredient, and adjust until the metrics are back in the green.
- Go dairy-free with fruit. Sorbet follows the same five stages, but balance depends almost entirely on sugar. Why Is My Sorbet Too Hard? covers the numbers.
People Also Ask
What makes gelato different from ice cream?
Gelato has less fat (6–9% against 14–18%), more milk solids, less air churned in (20–35% against 60–100%), and is served warmer, at about −12 to −14 °C instead of −18 °C. Together these make it denser and more intensely flavored.
Can an ice cream maker make gelato?
Yes. A home ice cream maker is exactly what you need; "gelato makers" for home use are the same machine. The difference between gelato and ice cream is in the recipe and serving temperature, not the machine. A home machine already works in less air than a commercial ice cream freezer.
Can I make gelato without a machine?
You can, but expect a coarser texture. Pour the cold, aged base into a shallow metal pan, freeze it, and stir it hard every 30 minutes for the first 2–3 hours to break up ice crystals as they form. A base with stabilizer and a little extra dextrose copes best. The result is closer to semifreddo than true gelato.
What are the most common mistakes when making gelato?
Measuring by volume instead of weight, skipping the aging stage, churning in a freezer bowl that wasn't frozen solid, and serving straight from a −18 °C freezer. If the recipe itself is unbalanced, no technique will fix it, so check the numbers first.
How long does homemade gelato last?
Best within 5–7 days, stored in a shallow, airtight container at the back of the freezer with parchment on the surface. Without stabilizer, aim for 2–3 days.
The Short Version
Balance the recipe, heat it to 70–85 °C, age it overnight, churn until it holds a ridge, harden it, then let it warm a little before you scoop. Get the first stage right in the calculator and the other four are just following the numbers.
Build your recipe in GelatoLator